Jyoti's Health Blog with Beauty Mirror -  A Touch of Glamour

This blog contains the health and beauty content such as healthy eating, beauty tips, disease & prevention, yoga & exercise, food & nutrition with healthy food recipe.

Pamper Yourself with Jyoti's Health Blog


My Blog "Jyoti's Health Blog" is all about healthy lifestyle with a beauty balance. Here you can learn about a healthy, happy and a balanced life naturally by following this Blog...

Updated

Showing posts with label Yoga & Exercise. Show all posts

Monday, January 11, 2021

January 11, 2021

Yoga Poses for High Blood Pressure

  High BP: Can Yoga Reduce Hypertension?

Know 5 Best yoga asanas for high blood pressure! 


High BP (high blood pressure) is also called Hypertension. This in itself is a serious health problem and if left untreated, high BP can lead to other serious diseases such as heart attack. According to a 2014 report of General of Hypertension, 29.3% of Indians are suffering from hypertension. The only way to do this is to get it checked regularly and the next logical step is how to control high blood pressure. 


Benefits of Yoga in High Blood Pressure

Neither high nor low blood pressure is good for the body. The most important thing is to be balanced. By doing Yogasana, health is good and no disease of any kind comes near. Yogasana keeps blood pressure under control and also helps to relieve stress. Apart from this, it is also very important to have a healthy diet. Yogasana calms the nerves and corrects the abnormal heart rate. Yoga helps to increase immunity and reduce the incidence of heart problems such as heart attack and stroke. Obesity can cause high BP. By doing yoga regularly, body weight is controlled. If there is no rest to the body and mind, there is a high risk of stress and high BP. By doing yoga, sleep becomes good and stress is reduced. Yoga gives positive energy to body and mind and brings happiness in your life. It also helps in reducing the problem of high blood pressure running for a long time.


Yoga Asanas for High Blood Pressure  

Here we are telling some asanas to keep low blood pressure balanced. However, it is important that you practice these yoga exercises under the guidance of a trained expert.

1. Child's Pose or Balasan

Performing balasan relieves stress and fatigue. It also keeps blood circulation normal.


How to do

  • To do Balasan, sit on your yoga mat or ground in Vajrasana.
  • Now inhaling, lift both hands directly above the head. Do not add palms.
  • Now while exhaling, bowed forward. Keep in mind that the hip joint has to bend, not the waist joint.
  • Tilt forward until the palm rests on the ground.
  • Now keep the head slowly on the ground.
  • Now you are in a state of balasan. Relax the entire body and inhale long and release outside.
  • Tightly connect the fingers of both hands. You have to keep your head in the middle and support it.
  • Now place the head gently between the two palms. Keep the breath normal.
  • You can stay in Balasan for 30 seconds to 2 minutes.
  • Repeat it 10-15 times


2. Thunderbolt Pose or Vajrasana

This yoga can be done after lunch or even after dinner, it helps in controlling obesity and increases the flow of blood in the lower abdomen.


How to do

  • Sit on your knees.
  • Mix the toes together and keep the ankles apart.
  • Place the buttocks on the soles of the feet in such a way that the soles of the feet are touching the outside of the buttocks.
  • Keep your hands on your knees. Keep the palms facing down.
  • The back and head should be straight but they should not be stressed.
  • Do not bend the spine excessively backwards. Close your eyes. Allow the hands and the entire body to feel relaxed.
  • Breathe normally and pay attention to your breath.
  • Do Vajrasana for as long as possible.

Note:-

This asana should be done for at least 5 minutes, especially to increase digestion immediately after a meal. In case of acute digestive disorder, do Vajrasana for 100 breaths before and after meals.


3. Seated Forward Bend or Paschimottanasan

Helps reduce belly fat. It also acts as an effective stress reliever and can normalize high BP.


How to do

  • Sit in the posture of Dandasana. Try to lengthen the spine by pressing the ground with light hands and breathing in.Lift the arms straight up and join.
  • Now, while exhaling, start turning from the hip joints forward. Slowly bring the hands along.
  • If possible, turn so far that you can hold the side of the leg with your hands.
  • If done properly, the lower part of the abdomen will touch your thigh, then the upper part, then the lower part of the chest and finally the head.
  • In total, breathe in and out 5 times so that you can easily stay for 30 to 60 seconds.
  • Gradually, as the strength and flexibility in your body starts increasing, you can increase the time but do not do more than 90 seconds.
  • After breathing 5 times, you can come out of this posture.
  • To get out of the posture, while exhaling, raise your hands and head and then give rest to the legs.


4. Bound Angle Pose or Baddha konasana

Stimulates the heart and leads to better circulation of blood throughout the body. It also relieves tension and nervousness.


How to do

  • Start in Dandasana.
  • Like butterfly, bend the knees and join the feet with both hands so that the soles are touching each other.
Method 1-
  • With the hands down and press the knee so that it touches the ground. But do not do more than physical stamina.
  • If the knee does not touch below the initial, then be patient. With time and effort the knees will start to fall down.
Method 2-
  • When the knee starts coming down and your flexibility increases, do this version.
  • Hold both hands with feet.
  • Bend forward from the hip joint until the head touches the ground.
  • This may take a few days or weeks or months to happen. Be patient

Note:-

Do either method 1 or 2 for 30 to 40 seconds.


5. Easy Pose or Sukhasana

Sukhasana reduces stress. This keeps the body and mind calm. It helps in reducing high blood pressure.


How to do

  • First of all, spread the legs in front of the body and sit.
  • Fold the right leg and keep the claw under the left thigh.
  • Fold the left leg and place the claw under the right thigh.
  • Keep hands on knees in knowledge posture.
  • Keep them straight without putting any stress on the head, neck and spine.
  • Close your eyes. Keep the whole body loose.
  • Do this asana for ten minutes.


Precautions while doing Yoga

  • Headstand and Sarvangasana increase the blood pressure in the brain because your body is inverted and the flow of blood becomes uncontrolled.
  • Viparita-karani (Legs up the wall pose) can also cause harm in high blood pressure. So avoid doing this asana.


Keep these things in mind

  • Relaxation from yoga practice is attained only after continuous practice and you get it slowly.
  • During the exercise, use objects such as pillow to support the body. This will not increase joint pain or body pain.
  • Make it easy according to physical capacity, do not stress too much. If the pain increases, stop practicing yoga immediately and consult a doctor.

Monday, September 28, 2020

September 28, 2020

Push Ups

 Push Ups Guide for Beginner


Along with balanced diet, physical exercise is also necessary to keep the body fit and healthy. Exercise can help in keeping the body fit as well as keeping many types of diseases away. In addition, stamina of the body also increases by exercising regularly. In this article, we are talking about one such special exercise i.e, push ups. In this article, we will explain what is push up. Also, we will give information about the benefits of push ups and how to do this exercise. Also keep in mind that before starting any physical exercise, it is necessary to take training from a trainer and it will be beneficial only by doing it regularly.


.


What is push up?

Push ups are a common exercise in which the entire body is placed parallel to the ground and kept upright. By placing the palms on both sides of the chest, the body is made up and down by emphasizing the arms and shoulders. In this state, the entire weight of the body is on the palms and toes of the feet. Push-ups can be helpful in strengthening muscles, triceps and shoulders as well as increasing body strength.


After knowing about push ups, here we are explaining the types of push ups.


Types of push ups


Push ups can be done in many ways. But, here we are telling you about some of its special and common types:


1. Standard push ups: This is the most common way of doing push ups. In this, the hands are placed parallel to the shoulder and some distance between the legs.


2. Modified push ups: In this method of push ups, the hands are kept parallel to the shoulders, but the knees remain adjacent to the ground. For those who are doing push ups for the first time, this approach is best for the beginning.


3. Wide push ups: In this push up, the legs are fully stretched and your hands are pushed upwards by keeping the hands at some distance from the shoulders. This method is also easier for people doing push ups for the first time.


4. Narrow push ups: In this method of push ups, the hands are placed inward near the chest. This method may seem a bit daunting in the beginning.


5. Decline Push Up: In this type of push up, the hands are placed parallel to the shoulder and the feet are placed on a slightly higher table or ladder. It takes more effort to do this, but it soon shows the effect.


6. Plyometric push-ups: This is an advanced way of doing push ups. In this, while pushing up, the upper part of the body is raised up and clapping. Then hands are placed back on the ground. During this time the claws remain adjacent to the ground.


Advantages of push ups

Like many types of exercise, push ups can also be beneficial for the body. Here we are explaining in detail about the benefits of push ups.


1. Strengthen hands, shoulders and chest

A research was done on students of Korean University to find out how push ups are beneficial for hands, shoulders and chest. Research published on the website of NCBI (National Center for Biotechnology Information) states that doing push-ups causes muscle strain. Also, hands, shoulders and chest are strengthened.


2. Relieve backache

Poor lifestyle and careless physical activity can cause back pain. In this case, push ups can help reduce this problem to some extent. Research has found that doing push-ups improves muscle strength. Also, a stretch in the muscle can be helpful in reducing pain by removing stiffness. People who have lower back pain can benefit from push ups. Also, there is agility in the body.


3. Strengthen muscles

One advantage of push ups is that if done properly, the muscles can become stronger. Some people between the ages of 20 and 30 were researched to confirm this fact. According to this research, the muscles of people's shoulders, arms and arms were strengthened by doing push ups.


4. Advantages of push ups to lose weight

Increasing weight or obesity can cause many types of problems. Push ups can be beneficial to overcome this problem. Some research is available on this topic on the NCBI website. According to them, people who do push ups, along with heart problems, obesity problems can be reduced to a great extent.


After knowing the advantages of push ups, now we are talking about how to do push ups exercises.


 Steps to do Push-Ups


Based on the different types of push ups mentioned above, here we are showing how to do push ups exercises.


1. Standard Push Up:

  • First of all, lay a yoga mat on the ground. After this, lie on your stomach.
  • Keep the neck straight and keep the palms under the shoulders. Also claws should be adjacent to the ground.
  • Now, with emphasis on the hands, lift the body upwards. Then come down comfortably.
  • Bring your body down until the chest touches the ground.
  • Now slowly raise your body back upwards. Keep your hands straight and stay in this position for 10 seconds.
  • Then slowly come back down.


2. Modified Push Up:

  • First of all place your hands slightly down the shoulder on the mat. Also, keep a short distance between the feet and keep the knees fixed to the ground.
  • Now take the rest of your body downwards as before.
  • Move your body down until your chest touches the ground.
  • After this, push the body back upwards.
  • Do this method several times in a row.


3. Wide Push Up:

  • To perform this push up, you get into a standard push up, but keep your hands a little distance from the shoulder.
  • After this, bring your body down comfortably, until the chest hits the ground.
  • After this, rise back up and repeat this method.


4. Narrow Push Ups:

  • Narrow push ups are initiated similar to standard push ups. All that has to be done is that both of your hands are placed inward towards the chest.
  • The entire method followed is similar to standard push ups.


5. Decline Push Up:

  • This push up is done using a table or stairs. Your hands are placed on the ground in a straight line and the feet are placed on the table or ladder.
  • After this, bring your body downward with ease and try to attach the chest to the ground.
  • Then move back upwards.


6. Plyometric Push-Ups:

  • To perform this push up, come into the position of standard push up.
  • After this move your body downwards.
  • Then raise the body upwards with a jerk and separate both hands from the ground or try to clap and then stabilize the hands back to their place on the ground.
  • Now bring your body back down and while coming upwards, do the same method as before.


Note: If you are doing push ups for the first time, then try to do it under the supervision of a knowledgeable person. Also, each push up should be done in a set of three.


Following the method of doing push ups, here we are telling you how to do push ups in C form.


Tips for doing push ups in proper form


Whether doing push ups or any other exercise, it is important to always keep in mind some useful things. Here we are giving some special tips for push ups.


  • While doing the push up, keep your hands facing the shoulder.
  • Keep the feet together or at a distance of about 12 inches.
  • Keep your back straight and leave your body weight on hands and feet.
  • Look down as you go downwards, and when you reach the bottom completely or until the elbow is at 90 degrees, then look towards the front.
  • While doing push ups, move your body downward with ease. It should not be hurried.
  • The wall must be bent at least 45 degrees to push up.
  • Try to get up in half the time you are taking to go down.


In this part of the article, we are going to explain the disadvantages of doing push ups.


 Side Effects of Push Up

Although push ups have been considered a good exercise, but if it is done due to lack of information or if done incorrectly, it can have negative consequences. Here we are giving information about the disadvantages of doing push ups.


  • Incorrect push ups can cause pain in the neck, back, abdomen and wrist.
  • In addition, there is a fear of injury to the elbow due to improper push ups and there is a possibility of sprains in the body.
  • Muscle strains and stiffness may also occur.


Any exercise, if it is done properly, can be beneficial for health. One of them is push ups. You learned about push ups and its benefits through the article, as well as information about how it should be done. If you are going to do a push up for the first time, then our advice would be to do it under the supervision of a good trainer. In the comment box below, you should tell about the benefits of push ups and how this article gives information about how it was beneficial for you.

Sunday, September 27, 2020

September 27, 2020

Workout at Home: No Gym, No Equipment

Lockdown Gym Workout at Home without any Equipment


Gym is closed in Lockdown, so do these 5 exercises in the evening after work from home, you will get best results.


The craze of excellent fitness occurs among boys. In lockdown, this craze does not happen, so we are telling you about 5 best exercises here.


Also read: Best Exercises to Help You Lose Weight


Many things have been completely locked due to the lockdown. In such a situation, those people who are going to the gym daily are getting the most trouble. After doing work from home, people are missing their gym exercise due to which many people have gain weight.


If you are also one of such people and you do not have any gym equipment in your home, then we are going to tell you some exercises that you can do to keep yourself fit by exercising at home during lockdown. So without delay we tell you about these exercises.


Basic Squat


You can do basic squat in any corner of the house. You do not necessarily need to go to the gym for this. By doing this exercise, your thighs are strengthened and their curve is also revealed. At the same time, by doing this exercise, your stomach problems can also be eliminated.


How to do

  • To perform a basic squat, first stand in a straight posture and keep a distance of 1-2 feet between your legs.
  • Now move your hands directly towards the front and keep the hands in a parallel position to the ground.
  • Now keeping your hands in front, bend your knees down at a 90 degree angle.
  • Now return to the initial position and repeat the same process again.
  • You can do this process at least 10 to 12 times.


Sit-ups


Sit-up exercise helps in reducing weight and reducing abdominal fat, as well as to make the stomach inside out. You can do this exercise after doing work from home and before dinner in the evening. This exercise is also done a lot by people who make six pack abs. After doing this exercise only for 4 to 5 days continuously, you will start seeing the results on your own.


How to do

  • First of all lie back on the ground and spread your legs straight.
  • Fold your hands behind the head.
  • Now keep your hands on the head and try to get up while pushing on the stomach.
  • If necessary, bend the legs from the knee.
  • Try to keep the feet clinging to the ground after the legs bend from the knees.
  • Now try to sit on the hips (Back) while lifting your body and then lie back on the ground in the initial position.
  • Then repeat the same process again.
  • If you have done this exercise in the gym then you will not have any problem in doing it at home.
  • You can do this exercise at least 10 to 15 times.


Jump Squat


Performing a jump squat also strengthens your leg as well as your back muscles. Apart from this, by doing this exercise, your body's day-long fatigue can also be removed. It is similar to the basic squat but in this jump squat you have to jump with the help of them instead of keeping your feet on the ground.


How to do

  • Stand in the position of the basic squat.
  • Now balance your body and jump a little with the help of your claws.
  • Note that you do not have to jump too much, but only jump to a height of half a foot from the ground, otherwise your body balance can get upset and you may get hurt.
  • You can do 10 to 15 jump squats.


Front Plank


The front plant exercise is considered to be the best for fitness and even after going to the gym, this exercise is definitely told by the trainer. Doing this exercise helps strengthen your hands and shoulders, as well as reduce your belly fat. This exercise has a lot of craze among the people who make six pack abs. You can do up to 5 minutes by making the front plant exercise the balance of the body.


How to do

  • To do front planks exercises, you have to come in the position of push-ups.
  • After getting into the position of the pushups, fold the hands with the elbow and rest on the ground.
  • Now stick both your legs together.
  • Now you can stay in this position for at least 5 minutes.


Push-ups


You all will know about the exercise of doing push-ups and you must have done it in the gym. Doing push-ups not only strengthens the muscles of your hands, but your chest also gets in good shape. People who want to make six pack abs can also get a great fitness by resorting to pushups. 


How to do

  • To do push-ups exercises, get down on all fours, placing your hands slightly wider than your shoulders.
  • Straighten your arms and legs.
  • Now stick both your legs together.
  • Lower your body until your chest nearly touches the floor.
  • Pause, then push yourself back up.
  • repeat and you can do 15 to 25 pushups at one time depending on your capacity.


Tuesday, July 14, 2020

July 14, 2020

Yoga for Beautiful Skin

Yoga for Beautiful Skin 

Swami Ramdev shares yoga asanas and pranayamas for healthy skin


When something wrong happens inside our body, it first shows on our skin. Proper blood circulation is very important for healthy and young skin. Due to poor lifestyle, food and stress, one starts to look old before time. The glow and freshness of the face disappear. In such a situation, one tends to invest in many expensive chemical products to hide them rashes, pimples and other skin problems. Many times, the chemical in the products do the opposite and harm the skin.
According to Swami Ramdev, natural ways are the best to get rid of any skin related problems. He claims that doing yoga regularly can make one look like 25 years old even at the age of 50. Along with staying physically fit through yoga, one can attain natural beauty by practicing pranayamas and yoga asanas at home.
According to Swami Ramdev, 4 things are most important for healthy skin and body. These are- diet, thoughts, relaxation and hard work. Therefore, it is important to keep these four things in balance to have a successful life. Swami Ramdev shares yoga asanas, pranayamas and home remedies to keep the skin beautiful and young for a longer time.

Yoga Asanas for healthy skin


  • Jogging- According to Swami Ramdev, if you are under 50 years of age then you can do many types of jogging as it is very effective to keep the skin fresh. Those who want to stay young should go for 10-20 minutes of fast jogging. You can also do jogging by standing in one place.
  • Surya Namaskar- Surya Namaskar activates good energy in the body. By doing Surya Namaskar, memory increases and the nervous system is strengthened. Apart from this, it gives a natural glow to the face.
  • Dand Baithak- According to Swami Ramdev, doing dand baithak daily removes belly fat. It strengthens muscles and makes the body beautiful and in shape. It also strengthens the legs and thighs. Apart from this, bones also become strong.
  • Sheershasana- This asana ensures proper blood circulation in the brain. It helps in hair growth and makes them healthy. It also helps in increasing concentration, enthusiasm, self-confidence as well as reducing facial wrinkles.
  • Sarvangasana- By doing this asana, there is rapid blood circulation throughout the body because of which natural glow comes on the face.
  • Mayurasana- Young people can do this asana for one and a half minutes. This will help keep you young always.
  • Sukshma Vyayama - If you are old and cannot do exercises like jogging, mayurasana and other yoga asanas, you can do suksha vyayamas for healthy skin.

  • Pranayamas for glowing skin

    While face yoga and face massage are helpful in tightening the skin, Swami Ramdev claims that pranayamas are the most effective way of keeping the skin young and healthy. They ensure proper blood circulation and keeps the skin glowing. He suggests doing anulom-vilom, kapalbhati, bhastrika, bhramari, udhith and ujjayi pranayamas to stay forever young and healthy. Other than keeping skin problems at bay, pranayamas help in reducing blood pressure and maintains sugar levels.

    Home remedies for young and clear skin


  • Get up early in the morning and drink Amla, Aloe Vera and Giloy juice
  • Drink 2 teaspoons of virgin coconut oil in the morning
  • Apply aloe vera gel on the face This will help you get rid of every problem related to pimples,       freckles, wrinkles etc
  • Eat a balanced diet
  • Eat almonds, dry grapes and figs
  • Eat seasonal fruits
  • Stay away from junk food, fast food and food packed in chemicals
  • Reduce salt and sugar intake. Instead, you can consume either black or rock salt.
  • Do not use refined oil. Use natural oils instead for cooking food
  • Four yoga poses for glowing skin

    We all want the glowing skin of Hollywood’s elite, but let’s be real: we don’t all have the money to spend on fancy treatments to get it. 
    Many factors can affect the clarity and coloring of your skin: stress, poor diet, lack of sleep and muscle tension, just to name a few. 
    SPINAL TWISTS: It with both legs straight in front of you. Adjust your legs so that you can sit evenly on your sitting bones.  Cross your right foot over your left thigh and place it on the floor outside your left knee. Fold your left leg in, with your foot outside your right hip. Hold your right knee with your left hand, and place your right hand on the floor diagonally behind you. Lift your left arm high. Twist the torso as you draw your elbow down on the outside of your right thigh.
    BENEFITS: Digestive health is a must for achieving healthy and nourished skin. The seated twist helps in removing toxins and other harmful substances from the organs. Clearing the body of waste is always good for the skin.
    SHOULDER STAND: Lie on the mat with your head on the floor. Lay your arms on the floor alongside your torso, then bend your knees and set your feet against the floor with the heels close to the sit bones. Exhale, press your arms against the floor, and push your feet away from the floor, drawing your thighs towards your chest. Stretch your arms out parallel to the edge of the blanket and turn them outward so the fingers press against the floor. Bend your elbows and draw them toward each other.. Raise your pelvis over the shoulders, so that the torso is relatively perpendicular to the floor. Inhale and lift your bent knees toward the ceiling, bringing your thighs in line with your torso and hanging the heels down by your buttocks. Finally inhale and straighten the knees, pressing the heels up toward the ceiling.
    BENEFITS: Increasing blood flow, especially to the face, is very beneficial in the treatment of acne. This is mainly because increased circulation means increased cell reproduction. You may find that regular inversions also leave you with a healthy facial glow.
    FISH POSE: Slowly roll onto your back. Press your palms down and lift up onto the top of your head. Walk your fingers toward your feet until your arms are straight—your elbows should be off the floor. Again press down firmly with your palms, and tuck your shoulder blades into your back; this will lift and open your chest and support your neck.  Keep your legs and feet strongly engaged
    BENEFITS: Promotes healthy skin by improving the functions of the thyroid, pineal, and pituitary glands and is said to normalize hormonal levels. This pose gives a good stretch to the muscles of the face and throat which makes it one of the beneficial exercises to reduce the appearance of a double chin.
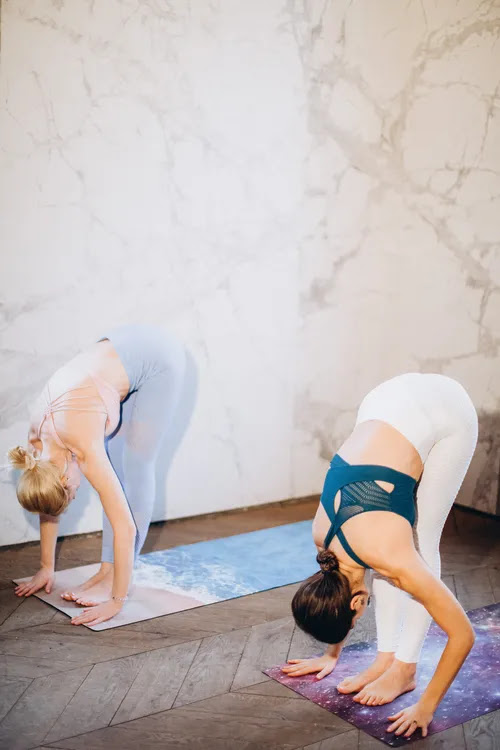
    STANDING FORWARD BEND: Fold With feet hip-width apart, interlock fingers behind your back. As you bend forward the back of your hands should be pointing towards the ceiling. Relax your head toward the ground. Relax head and neck completely while you feel an opening of the chest, and breathe here for 10 deep breaths.
    BENEFITS: This exercise helps promote circulation and encourages blood flow to your head. It also helps to calm the nervous system and relieve tension.
  • Wednesday, July 1, 2020

    July 01, 2020

    Best Exercises to Help You Lose Weight

     Best Exercises to Help You Lose Weight


    Obsessed with cycling? Adore weight-training? Congratulations on finding a workout you love. But if your routine is one- note, you’re likely missing out on a whole symphony of benefits that other types of exercise offer. It can even be harmful. “Doing the same thing all the time can be hard on your body,” says Chris Gagliardi, an American Council on Exercise-certified health coach and personal trainer. Mixing it up with a different workout a few days a week creates a well-rounded program that works all your muscles, addresses imbalances and helps prevent injury. Here, three exercise pairings that go particularly well together.


    • Cycling & Yoga

    Yoga works wonders for flexibility and strength, but it may not get your heart pumping hard enough, says Gagliardi. So pair your practice with pedaling, which will boost your heart rate and benefit your cardiovascular system. Cycling also works your hamstrings (which many asanas don’t target) and gives your upper body and back (places all those Sun Salutations do tax) a break. Try a spin class, or hit the trail or road, where you’ll reap the mood-boosting benefits of nature too.
    Meanwhile, yoga poses strengthen the back, core and upper body—areas that cycling tends to neglect. What’s more, the deep breaths and mind-body connections provide a good balance to the blaring tunes of a spinning class, and can help you stay centered while navigating traffic on road rides.


    • Swimming & Plyometrics
    Hitting the pool offers a total-body workout that boosts cardiovascular fitness and protects against chronic conditions like diabetes and heart disease. But there’s one component it lacks: impact. Because of that, it doesn’t help you maintain strong bones the way weight-bearing exercises like walking and running do. The ideal solution? Balance swimming with explosive moves like box jumps, skips and bounds. These exercises can be intense, so start small and then progress. For instance, practice side lunges, then work your way up to side-to-side hops.
    And if weight-bearing plyo moves are already part of your regimen, make some of your leaps in the pool. There, the supportive nature of water can give joints a break. Plus, it’ll help you hit your cardio targets.


    • Running & Strength Training
    The constant pounding of shoes on pavement leaves runners at risk for overuse injuries like Achilles tendinitis and runner’s knee. Doing leg and core exercises, such as squats, lunges and crunches, can reduce your risk of these ailments by making your muscles, joints and connective tissues stronger and more resilient. Add in moves to tone the upper-body muscles that running doesn’t target, as well.
    On the flip side, there’s good reason for those who hang out near the weight rack to venture toward the treadmills, Gagliardi says. Resistance training typically doesn’t get your heart rate up enough to count toward the recommended 150 weekly minutes of moderate-intensity cardio. Because running is so vigorous, you can get by with just 75 weekly minutes of huffing and puffing.